

Essential Hatha Yoga Poses for Beginners: Your First Steps to a Mindful Practice
Embarking on a yoga journey can feel both exciting and a little daunting, especially with the multitude of styles available. For many, Hatha Yoga stands as the perfect gateway, offering a gentle yet profound introduction to the ancient practice. Hatha Yoga for beginners typically involves a series of fundamental postures (asanas) held for several breaths, interspersed with controlled breathing techniques (pranayama) and moments of stillness. It’s a foundational style that emphasizes alignment, stability, and mindfulness, making it ideal for those new to yoga or anyone seeking a slower, more meditative approach to movement. This comprehensive guide will illuminate the essential Hatha yoga poses, providing you with the knowledge and confidence to begin your practice with grace and intention.
Unveiling the Essence of Hatha Yoga: More Than Just Poses
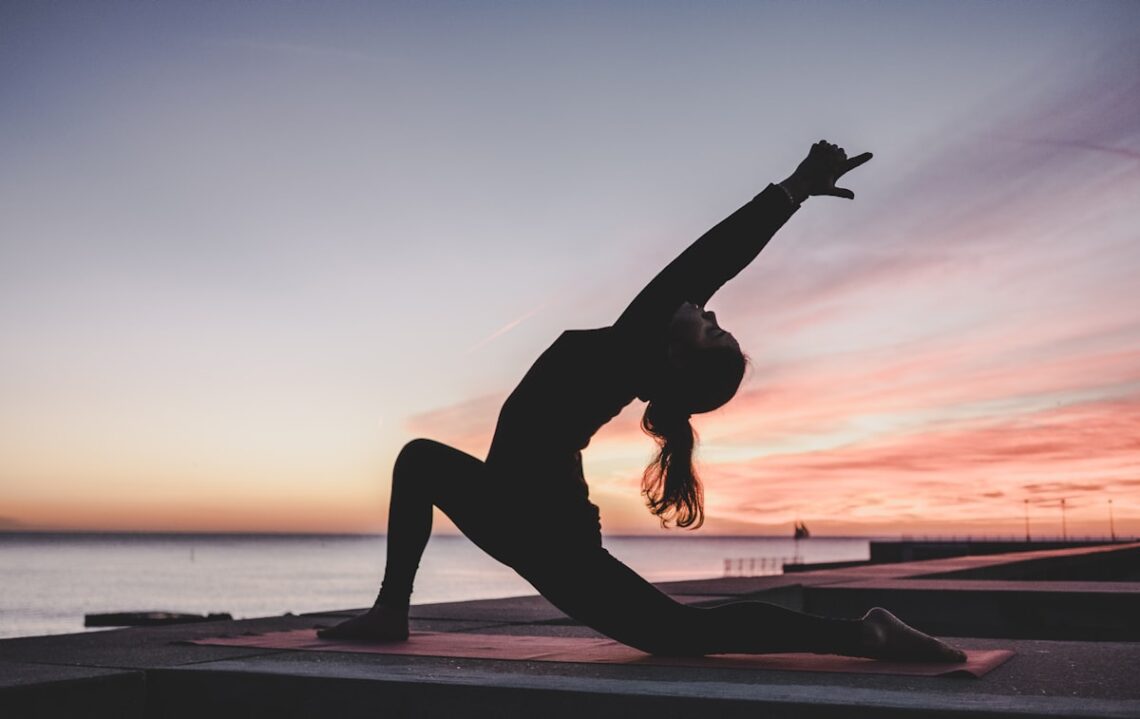
▵ Related Visual – Essential Hatha Yoga Poses for Beginners: Your First Steps to a Mindful Practice
Figure 1: High-resolution visual context helper to optimize for user engagement.
Hatha Yoga is often misunderstood as merely a collection of physical exercises. In reality, it’s a branch of yoga that focuses on balancing the physical and mental aspects of the self through asanas (postures), pranayama (breathing techniques), and meditation. The term “Hatha” itself is derived from the Sanskrit words “Ha” (sun) and “Tha” (moon), symbolizing the union of opposing energies within us – strength and flexibility, effort and surrender, active and receptive. For a beginner, this means finding a holistic practice that not only strengthens the body but also calms the mind and cultivates a deeper sense of self-awareness.
Historically, Hatha yoga was developed as a preparatory system for meditation, designed to purify the body and make it strong and steady enough to sit for extended periods in contemplation. Today, while it still serves this purpose, it’s widely embraced for its myriad health benefits, from stress reduction and improved flexibility to enhanced focus and overall well-being. It’s a slower-paced style compared to dynamic Vinyasa or Ashtanga, making it incredibly accessible for all body types, fitness levels, and ages.
Why Hatha Yoga is the Ideal Starting Point for Your Journey
Many new to yoga find themselves drawn to faster, more intense styles, often swayed by images of advanced inversions or complex flows. However, starting with Hatha offers distinct advantages that lay a crucial groundwork for any future yoga exploration:
1. Emphasis on Foundation and Alignment: Hatha classes typically spend more time breaking down individual poses, ensuring students understand proper alignment. This is vital for preventing injuries and building a strong, safe practice. Learning correct form from the outset ensures you develop good habits that will serve you well as you progress.
2. Slower Pace for Deeper Awareness: The deliberate holding of poses allows beginners to truly feel the posture in their body, understanding where tension lies, where strength is needed, and how to breathe through discomfort. This cultivates profound body awareness and a meditative state.
3. Accessible to All: Hatha yoga is inherently adaptable. Teachers often provide modifications, making poses achievable regardless of your current flexibility, strength, or physical limitations. It’s truly a practice for every body.
4. Integration of Breath: Pranayama is often a central component of Hatha classes. Learning to synchronize breath with movement, and to control the breath itself, is a powerful tool for calming the nervous system and enhancing mental clarity.
5. Cultivates Patience and Mindfulness: In a world that constantly pushes for speed and instant gratification, Hatha yoga invites you to slow down, be present, and embrace the journey rather than just the destination. This cultivates patience, self-compassion, and a deeper connection to the moment.
Preparing for Your First Hatha Yoga Practice
Before you unroll your mat, a little preparation can significantly enhance your experience. Creating a conducive environment and having the right mindset are just as important as knowing the poses themselves.
Essential Gear and Setup
- Yoga Mat: A good quality, non-slip mat is crucial for stability and comfort. Look for one with adequate cushioning.
- Comfortable Clothing: Wear clothes that allow for a full range of motion without restricting your breath or movement. Layers are often helpful as your body temperature might fluctuate.
- Props (Optional but Recommended): While not strictly essential, props can be invaluable for beginners, helping you achieve proper alignment and comfort.
- Yoga Blocks: Extend your reach, provide support, or deepen stretches. Two blocks are ideal.
- Yoga Strap: Helps deepen stretches and makes certain poses more accessible.
- Blanket or Cushion: For padding under knees or hips in seated poses, or for comfort during Savasana.
- Hydration: Keep a water bottle nearby, especially if practicing in a warmer environment.
- Quiet Space: Find a peaceful corner where you won’t be disturbed. Turn off notifications and let family members know you need some uninterrupted time.
Mindset Matters: Approaching Your Practice with Intention
Yoga is not about perfection, but about practice. Approach each session with:
- Patience: Your body will change and adapt over time. Celebrate small victories and don’t get discouraged by what you can’t do yet.
- Non-judgment: Let go of expectations and comparisons. Your practice is unique to you.
- Listen to Your Body: This is perhaps the most important rule. Yoga should challenge you, but never cause sharp pain. Modify, rest, or skip a pose if it doesn’t feel right.
- Consistency: A regular, even short, practice is more beneficial than infrequent long sessions.
- Beginner’s Mind: Stay curious and open to learning, even if you repeat the same poses.
Foundational Hatha Yoga Poses for Beginners: A Deep Dive
Here, we explore a selection of essential Hatha yoga poses perfect for beginners. Each pose is broken down with step-by-step instructions, benefits, and important tips for safe and effective practice. Remember to move slowly and link your breath to your movements.
1. Tadasana (Mountain Pose)
- Description: The ultimate foundational standing pose, Tadasana teaches you to stand with stability, balance, and awareness, bringing your body into proper alignment from the ground up.
- How to Practice:
1. Stand with your feet hip-width apart or together, big toes touching, heels slightly apart.
2. Ground down evenly through all four corners of your feet. Feel your arches lift.
3. Engage your thigh muscles, lifting your kneecaps. Gently tuck your tailbone slightly down, lengthening your lower back.
4. Draw your navel gently towards your spine. Lift through your sternum, broaden your collarbones, and let your shoulders relax down and back.
5. Allow your arms to hang naturally by your sides, palms facing forward or inwards. Lengthen through the crown of your head.
6. Keep your gaze soft and steady, either straight ahead or with eyes closed. Breathe deeply and evenly.
- Benefits: Improves posture, strengthens thighs, knees, ankles, abdomen, and buttocks. Firms up the feet and legs, increases body awareness, and cultivates balance.
- Tips: Imagine a string pulling your head upwards, creating length in your spine. Gently rock back and forth, side to side, to find your center of balance.
2. Balasana (Child’s Pose)
- Description: A deeply restorative and calming pose, Balasana is a fantastic resting posture that gently stretches the hips, thighs, and ankles while calming the brain and helping to relieve stress and fatigue.
- How to Practice:
1. Begin on your hands and knees (tabletop position). Separate your knees wide apart, as wide as your mat, or keep them together if that feels better.
2. Bring your big toes to touch behind you.
3. Slowly sink your hips back towards your heels. If your hips don’t reach your heels comfortably, place a folded blanket or cushion between your hips and heels for support.
4. Walk your hands forward, extending your arms, and rest your forehead on the mat. Alternatively, bring your arms back alongside your torso with palms facing up.
5. Allow your torso to rest between your thighs (if knees are wide) or on your thighs (if knees are together).
6. Breathe deeply, feeling your back expand with each inhale and soften with each exhale.
- Benefits: Gently stretches the hips, thighs, and ankles. Calms the brain and helps relieve stress and fatigue. Soothes the nervous system and can alleviate back and neck pain when supported.
- Tips: If your forehead doesn’t reach the mat, stack your fists or use a block under your forehead. You can also place a rolled blanket under your ankles for comfort.
3. Adho Mukha Svanasana (Downward-Facing Dog)
- Description: One of the most iconic and frequently practiced yoga poses, Downward-Facing Dog is a full-body stretch that strengthens and lengthens, often serving as a transition pose or a resting pose in more dynamic practices.
- How to Practice:
1. Start on your hands and knees, with wrists under shoulders and knees under hips (tabletop).
2. Spread your fingers wide, pressing firmly through your palms and knuckles. Tuck your toes under.
3. On an exhale, lift your hips up and back, straightening your legs as much as possible without locking your knees.
4. Aim to create an inverted ‘V’ shape with your body. Keep a slight bend in your knees, especially if your hamstrings are tight.
5. Let your head hang naturally, releasing tension in your neck. Gaze towards your feet or navel.
6. Press your chest gently towards your thighs, extending your spine. Actively press through your hands and lift through your sit bones.
7. Breathe deeply, feeling the stretch in your hamstrings and calves. If comfortable, you can gently pedal your feet, bending one knee then the other.
- Benefits: Strengthens arms and legs. Stretches the shoulders, hamstrings, calves, and arches of the feet. Calms the brain and helps relieve stress. Energetic and rejuvenating.
- Tips: If your hamstrings are very tight, keep your knees generously bent. Focus on lengthening your spine rather than getting your heels to the floor. Your heels may never touch, and that’s perfectly fine.
4. Marjaryasana-Bitilasana (Cat-Cow Pose)
- Description: A gentle, flowing sequence that warms up the spine and increases flexibility. It’s excellent for connecting movement with breath and releasing tension in the back.
- How to Practice:
1. Begin on your hands and knees in tabletop position. Align your wrists directly under your shoulders and your knees directly under your hips. Spread your fingers wide.
2. For Cow Pose (Bitilasana): As you inhale, drop your belly towards the mat, lift your chest and tailbone towards the ceiling. Gaze gently forward or slightly upward.
3. For Cat Pose (Marjaryasana): As you exhale, round your spine towards the ceiling, drawing your navel towards your spine. Let your head drop, tucking your chin to your chest.
4. Flow smoothly between Cow and Cat poses, synchronizing each movement with an inhale (Cow) and an exhale (Cat). Repeat for 5-10 rounds.
- Benefits: Warms up and stretches the spine, improves flexibility of the back and neck. Strengthens abdominal muscles, coordinates breath and movement, and relieves stress.
- Tips: Move slowly and mindfully. Let your breath initiate the movement. Keep your core gently engaged throughout.
5. Virabhadrasana I (Warrior I)
- Description: A powerful standing pose that builds strength in the legs and core, opens the hips, and stretches the chest and shoulders. It embodies courage and determination.
- How to Practice:
1. Start in Tadasana (Mountain Pose). Step your right foot back about 3-4 feet, turning your right toes out slightly (about a 45-60 degree angle).
2. Keep your left heel aligned with your right heel, or slightly wider for more stability.
3. Bend your front (left) knee directly over your left ankle, ensuring your shin is perpendicular to the floor. Your front thigh should be as close to parallel to the floor as possible.
4. Square your hips towards the front of your mat as much as comfortable. This might mean keeping your back foot turned out a bit more.
5. Lift your torso and sweep your arms overhead, palms facing each other, fingers reaching high. Relax your shoulders down away from your ears.
6. Gaze forward or slightly upward. Hold for several breaths, then repeat on the other side.
- Benefits: Strengthens legs, core, and ankles. Stretches hips, groin, chest, and shoulders. Increases stamina and improves balance. Builds confidence and focus.
- Tips: If squaring your hips is difficult, widen your stance (feet wider apart, like on two separate train tracks). Ensure your front knee doesn’t collapse inward.
6. Trikonasana (Triangle Pose)
- Description: A fantastic standing pose for stretching the hamstrings, groins, and hips, while strengthening the core and improving balance. It creates length and openness through the sides of the body.
- How to Practice:
1. Stand with your feet wide apart, about one leg’s length distance. Turn your right foot out 90 degrees and your left foot slightly in (about 15 degrees). Align your front heel with the arch of your back foot.
2. Extend your arms out to the sides, parallel to the floor, palms facing down.
3. Inhale, and as you exhale, reach forward with your right hand as if someone is pulling your arm. Maintain length in both sides of your torso.
4. Hinge at your right hip, bringing your right hand down to your shin, ankle, or a block placed outside your right foot. Your left arm reaches straight up towards the ceiling, stacking over your right shoulder.
5. Gaze at your top thumb, straight ahead, or down at your front foot. Keep both legs engaged and strong.
6. Hold for several breaths, then inhale to come up. Repeat on the other side.
- Benefits: Strengthens legs, knees, and ankles. Stretches hips, groins, hamstrings, and calves. Opens the chest and shoulders. Improves digestion, balance, and focus.
- Tips: Don’t collapse onto your bottom hand; keep your core engaged to support your torso. Imagine your body between two panes of glass, keeping a flat plane.
7. Sukhasana (Easy Pose)
- Description: A simple, comfortable cross-legged seated pose, perfect for meditation, breathwork, or simply finding a stable and relaxed upright posture. It encourages an open heart and calm mind.
- How to Practice:
1. Sit comfortably on your mat, ideally on a folded blanket or cushion to elevate your hips. Cross your legs at the shins, allowing your knees to fall open naturally.
2. Ensure your feet are comfortable, perhaps tucked slightly under the opposite knee.
3. Lengthen your spine, imagining the crown of your head reaching towards the ceiling. Relax your shoulders down and back.
4. Rest your hands gently on your knees, palms up or down, or in a mudra (hand gesture) like Jnana Mudra (thumb and forefinger touching).
5. Close your eyes or soften your gaze. Breathe deeply and evenly.
- Benefits: Calms the brain and promotes inner peace. Stretches the hips and ankles. Strengthens the back and improves posture. Prepares the body for meditation.
- Tips: If your knees are much higher than your hips, use a thicker cushion or block to sit on. You can also place blocks under your knees for support if they don’t comfortably rest on the floor.
8. Paschimottanasana (Seated Forward Bend)
- Description: A deep forward fold that stretches the entire back of the body, from hamstrings to the spine. It’s calming and can help relieve stress and mild depression.
- How to Practice:
1. Sit on your mat with your legs extended straight out in front of you, feet flexed (toes pointing up). Sit tall, grounding down through your sit bones.
2. Inhale, lift your arms overhead, lengthening your spine.
3. Exhale, hinge forward from your hips, leading with your chest. Keep your spine long; avoid rounding your back initially.
4. Reach for your shins, ankles, or the outer edges of your feet. If you can comfortably grasp your feet, keep your arms extended.
5. Once you’ve reached your maximum comfortable stretch, allow your head to relax towards your shins. Maintain a long spine, even if it means a smaller forward fold.
6. Hold for several breaths, feeling the stretch. On each exhale, you might find a little more space to deepen.
- Benefits: Stretches the spine, hamstrings, and calves. Calms the brain and helps relieve stress and mild depression. Stimulates internal organs. Improves digestion.
- Tips: If your hamstrings are tight, keep a generous bend in your knees. You can also sit on a folded blanket to tilt your pelvis forward. Use a strap around your feet if you can’t reach them comfortably.
9. Bhujangasana (Cobra Pose)
- Description: A gentle backbend that strengthens the spine, chest, and abdomen, while stretching the chest and shoulders. It’s an energizing pose that can improve mood.
- How to Practice:
1. Lie on your stomach with your legs extended straight back, tops of your feet on the mat. Place your hands on the mat directly under your shoulders, fingers pointing forward.
2. Draw your elbows in towards your body, hugging them close. Press the tops of your feet, thighs, and pelvis firmly into the mat.
3. On an inhale, gently lift your head and chest off the floor, using your back muscles more than pushing heavily with your hands. Keep your neck long and avoid craning your head back too far.
4. Keep your shoulders relaxed down and back, away from your ears. Gaze gently forward.
5. Hold for a few breaths, engaging your core and back muscles. Exhale to slowly lower back down.
- Benefits: Strengthens the spine, firms the buttocks. Stretches the chest and abdomen. Improves flexibility of the spine. Can help relieve stress and fatigue.
- Tips: Keep your pubic bone pressed into the mat. Use minimal pressure through your hands; imagine you could lift them off the floor. Don’t go for maximum height if it compresses your lower back.
10. Savasana (Corpse Pose)
- Description: The final and arguably most important pose in any yoga practice, Savasana is a pose of complete relaxation. It allows the body and mind to integrate the benefits of the practice, restoring balance and calm.
- How to Practice:
1. Lie flat on your back on your mat. Allow your legs to extend long, letting your feet fall open naturally to the sides.
2. Rest your arms by your sides, palms facing up, slightly away from your torso. Ensure your shoulders are relaxed and away from your ears.
3. Close your eyes gently. Take a few deep breaths, then allow your breath to return to its natural rhythm.
4. Consciously relax every part of your body, starting from your toes and moving up to the crown of your head. Release any tension in your jaw, forehead, and eyes.
5. Remain still and observe your breath and sensations without judgment. Allow yourself to completely surrender.
6. Stay in Savasana for at least 5-10 minutes.
- Benefits: Calms the brain and helps relieve stress and mild depression. Reduces headache, fatigue, and insomnia. Lowers blood pressure. Integrates the physical and mental benefits of yoga.
- Tips: If your lower back feels uncomfortable, place a rolled blanket or bolster under your knees. Cover yourself with a blanket if you get cold easily. Try to resist the urge to fidget.
Crafting Your First Hatha Yoga Sequence: A Step-by-Step Flow
Learning individual poses is one thing, but stringing them together creates a harmonious flow. This simple Hatha sequence for beginners will help you integrate the poses into a cohesive practice. Remember to listen to your body and modify as needed. Aim for 3-5 breaths in each pose, unless otherwise specified.
Estimated Time: 20-30 minutes
1. Preparation & Centering (3-5 minutes)
- Sukhasana (Easy Pose): Start seated comfortably on a cushion. Close your eyes, lengthen your spine, and bring your hands to your knees. Focus on your breath, letting go of external distractions. Take 5-10 deep, mindful breaths.
- Gentle Neck Rolls: Slowly roll your head from side to side, then front to back, releasing neck tension.
- Shoulder Rolls: Roll shoulders up, back, and down a few times.
2. Warm-up: Spinal Mobility (5-7 minutes)
- Marjaryasana-Bitilasana (Cat-Cow Pose): Come onto hands and knees. Flow through 5-10 rounds of Cat-Cow, coordinating with your breath (inhale for Cow, exhale for Cat).
- Balasana (Child’s Pose): Rest in Child’s Pose for 1-2 minutes, allowing your breath to deepen.
3. Standing Poses: Building Strength and Stability (8-10 minutes)
- Tadasana (Mountain Pose): Come to stand at the top of your mat. Find your grounding, feeling all four corners of your feet.
- Sun Salutation A (Modified for Beginners) – 3 Rounds:
1. Inhale: Arms sweep up overhead.
2. Exhale: Forward Fold (Uttanasana) – generously bend knees.
3. Inhale: Halfway Lift (Ardha Uttanasana) – flat back.
4. Exhale: Step back to Adho Mukha Svanasana (Downward-Facing Dog). Hold for 5 breaths.
5. Inhale: Step one foot forward, then the other, to return to the top of the mat.
6. Exhale: Forward Fold.
7. Inhale: Rise all the way up, arms overhead.
8. Exhale: Hands to heart center, or release to Tadasana.
- Virabhadrasana I (Warrior I): Step right foot back. Hold for 3-5 breaths. Return to Tadasana, then repeat on the left side.
- Trikonasana (Triangle Pose): Step feet wide. Practice on the right side, hold for 3-5 breaths. Return to center, then repeat on the left side.
4. Seated and Supine Poses: Lengthening and Releasing (7-9 minutes)
- Paschimottanasana (Seated Forward Bend): Sit down, extend legs. Fold forward gently. Hold for 5 breaths. Release slowly.
- Bhujangasana (Cobra Pose): Lie on your stomach. Practice 2-3 gentle Cobra lifts, holding each for a few breaths.
- Apanasana (Knees-to-Chest Pose): Lie on your back. Hug both knees into your chest. Gently rock side to side to massage your lower back. Hold for 5-10 breaths.
5. Cool Down & Relaxation (5-10 minutes)
- Savasana (Corpse Pose): Extend your legs and arms, close your eyes. Allow complete relaxation for 5-10 minutes. This is crucial for integrating the benefits of your practice.
Mastering the Breath: Introduction to Pranayama for Beginners
In Hatha yoga, the breath (prana, or life force) is just as important as the physical postures. Pranayama refers to specific breathing techniques designed to control the breath, thereby influencing the flow of prana and calming the mind. For beginners, focusing on awareness and lengthening the breath is key.
1. Dirga Pranayama (Three-Part Breath)
- Description: This technique brings awareness to filling the lungs completely, first into the belly, then the rib cage, then the chest. It’s incredibly grounding and calming.
- How to Practice:
1. Lie on your back or sit comfortably. Place one hand on your belly and the other on your chest.
2. Inhale: Slowly and deeply, first feel your belly expand under your hand. Then, continue to inhale, feeling your rib cage expand laterally. Finally, let the breath rise to your upper chest, feeling it lift.
3. Exhale: Slowly and completely, first release the breath from your upper chest, then your rib cage contracts, and finally, gently draw your navel towards your spine to empty your belly.
4. Continue this smooth, wave-like breathing for 5-10 minutes. Aim for equal length inhales and exhales.
- Benefits: Calms the nervous system, increases lung capacity, improves oxygenation, and brings deeper body awareness.
2. Ujjayi Pranayama (Victorious Breath / Ocean Breath)
- Description: A gentle constriction at the back of the throat creates a soft, audible oceanic sound during both inhale and exhale. This breath helps to build internal heat and focus.
- How to Practice:
1. Sit comfortably. Take a deep breath in through your nose.
2. As you exhale, make an
Key Takeaways & Executive Summary
- Hatha Yoga is an ideal starting point for beginners, focusing on fundamental poses, proper alignment, and mindful breathing (pranayama) at a gentle pace.
- Essential Hatha poses like Tadasana, Balasana, Adho Mukha Svanasana, Virabhadrasana I, Trikonasana, Sukhasana, Paschimottanasana, Bhujangasana, and Savasana build strength, flexibility, and body awareness.
- Consistency and listening to your body are paramount; a short, regular practice with intentional breathing and proper setup will yield significant physical and mental benefits over time.
Frequently Asked Questions
Q: How often should a beginner practice Hatha Yoga to see results?
A: For beginners, consistent practice is more important than duration or intensity. Aim for 2-3 times per week, even if each session is only 20-30 minutes long. This allows your body to build muscle memory, improve flexibility, and adapt to the postures without overexertion. Over time, as you become more comfortable, you can gradually increase the frequency or length of your sessions. Listen to your body and remember that rest days are just as crucial for recovery and integration.
Q: What’s the difference between Hatha Yoga and other styles like Vinyasa or Ashtanga?
A: The primary difference lies in the pacing and sequencing. Hatha Yoga typically involves holding individual poses for several breaths, allowing practitioners to focus deeply on alignment and stability, with distinct breaks between poses. Vinyasa yoga, in contrast, is characterized by a fluid, dynamic flow where movements are synchronized with the breath, creating a continuous, often faster, sequence. Ashtanga yoga is a rigorous, set sequence of poses that are practiced in the same order every time, often with a powerful, specific breath. Hatha is generally the slowest and most foundational of these, making it excellent for learning the basics before exploring more dynamic styles.
Q: Can Hatha Yoga help with weight loss or is it only for flexibility and relaxation?
A: While Hatha Yoga might not burn calories as rapidly as high-intensity cardio or dynamic Vinyasa, it certainly contributes to weight loss and overall wellness in several ways. Firstly, it builds lean muscle mass, which boosts metabolism. Secondly, regular practice improves body awareness, leading to healthier lifestyle choices and mindful eating. Crucially, Hatha Yoga’s emphasis on stress reduction and mental calm can help curb emotional eating and reduce cortisol levels, which are often linked to weight gain. So, while it excels in flexibility and relaxation, it’s also a powerful tool for holistic weight management.
Verified Topic Contributor & Publisher
“Dr. Anya Sharma is a highly respected yoga therapist, certified RYT-500 instructor, and holistic wellness coach with over 15 years of experience. Holding a Ph.D. in Kinesiology, her expertise lies in blending traditional yogic wisdom with modern biomechanics to make yoga accessible and beneficial for all body types and abilities. Dr. Sharma specializes in therapeutic yoga, guiding countless individuals through mindful movement and breathwork to alleviate chronic pain, reduce stress, and cultivate profound inner peace. Her writings are recognized for their clear, compassionate, and deeply knowledgeable approach to empowering practitioners on their wellness journey.”
